|
|
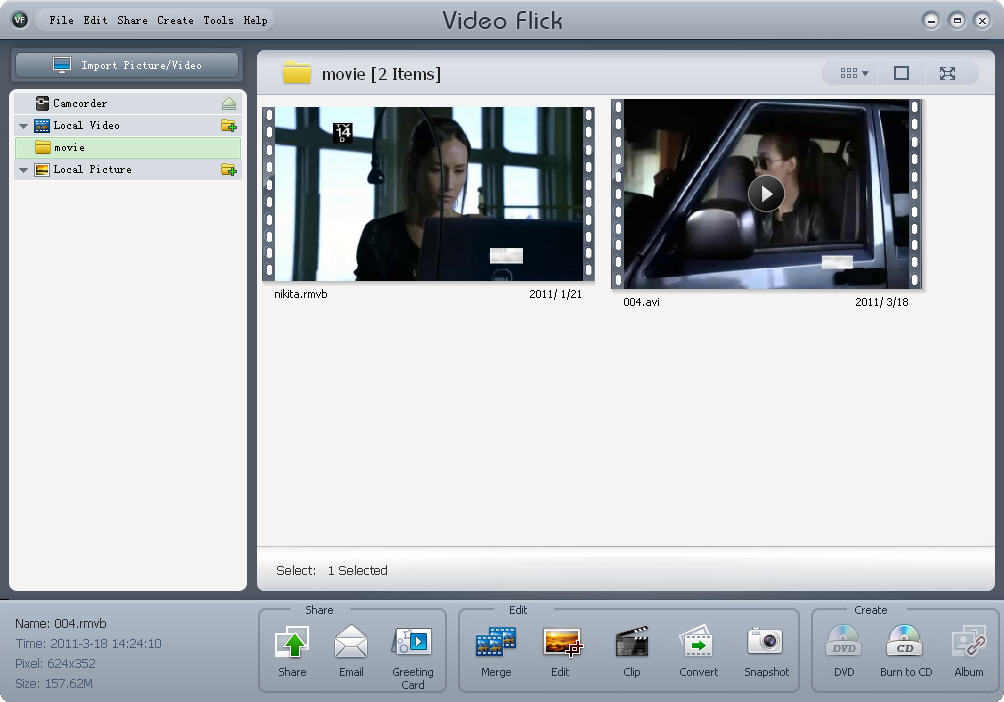
ClipVideoFlick supports to clip any part of your video item into AVI video clips. The clipping function can be available on video items. Now, let's do it step by step: Step 1. Select your desired vide item you want to clip.
Step 2. Click
Note: Right click the selected clip to choose to delete the existed clip. Step 3. Click
To give up clipping, just click After clipping finished, it will go to the save location directly to show the clips. The default save path is C:\Documents and Settings\Administrator\My Documents\My Videos. You can click Click |
If you can’t find what you want here, please contact us. We'd love to hear from you or your friends. Please send an email to:
support@blazevideo.com We will reply you in 24-72 hours. Please contact us again after 72 hours without response. Search Help:
Help with other products
|
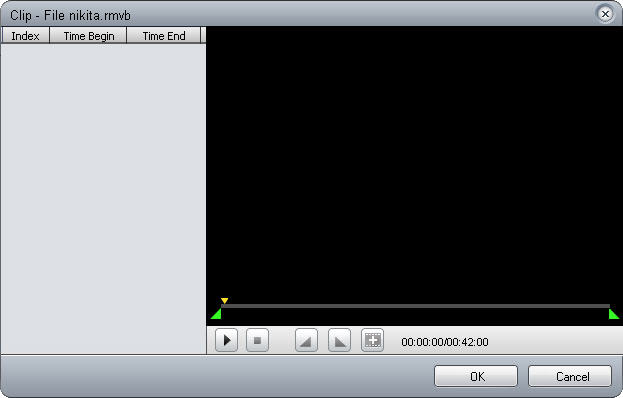
 : Show current playing progress. Drag the play bar to play forward or backward.
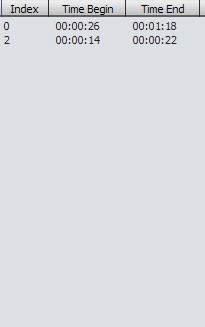 : show details of clips, such as clip numbers, Time Begin and Time End
 to go back to main window.